
Inviting Collaborators
Manage your blog team by inviting and managing collaborators
Viewing Current Team Members
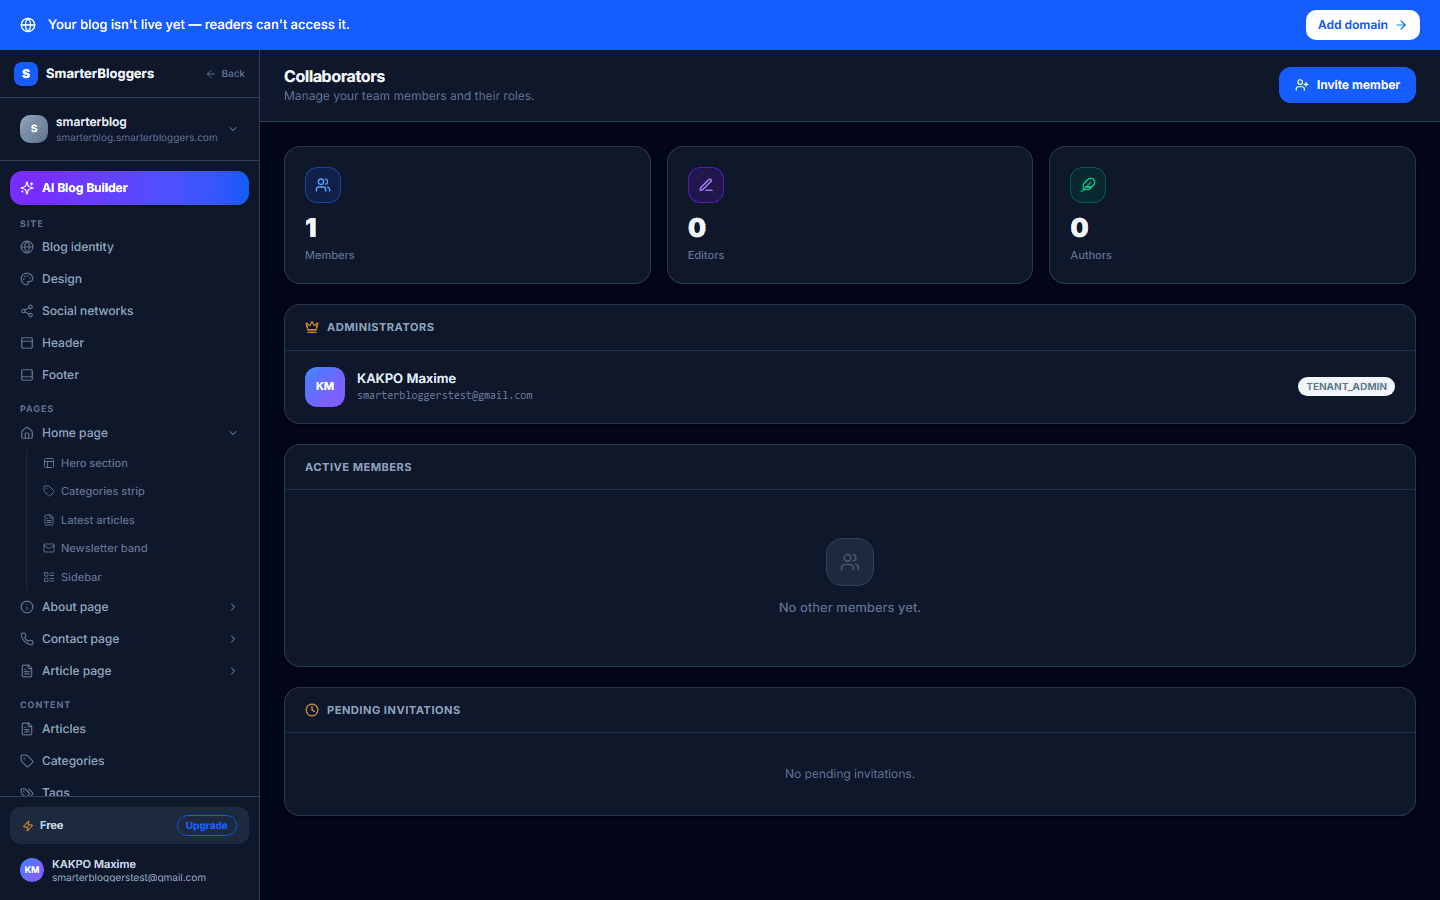
To view the current team members of your blog, navigate to the 'Collaborators' page. Here, you will see a list of all members, including their roles, display names, and email addresses. Members are categorized into two sections: Administrators and Members. Administrators have the highest level of access, while Members can have various roles such as Editor, Author, or Viewer. Each member's role is displayed with a badge indicating their permissions.
- Ensure you have the appropriate permissions to view the team members.
What Each Role Can Actually See and Do
Inviting someone does not give them the same view of the blog you have. Only the owner (Administrator) sees the full Studio: site design, settings, domains, accounting, and every author's content. Everyone else is scoped to their own work:
- Viewer: read-only. Can sign in and see their own earnings (if they have an active guest revenue share on this blog), but cannot create or edit articles or media.
- Author: can create, edit, and submit their own articles for review, and upload their own media. Cannot publish an article directly, cannot moderate comments, and cannot see other members' articles, media, or comments — only their own.
- Editor: everything an Author can do, plus can publish/unpublish and moderate comments — but still only on their own articles. Approving or rejecting a submitted-for-review article always requires the owner, regardless of Editor status.
In short: an invited collaborator's Studio menu only shows Articles, Media, Comments and their own earnings — never the blog's site design, settings, or other authors' content. This applies at both the menu level and the data level: even a direct API call for someone else's article is rejected unless you're the owner.
- A collaborator who should share in the blog's ad revenue needs a separate step — see the "Sharing ad revenue with guest authors" guide to set their percentage; inviting them here does not assign one automatically.
Inviting a New Collaborator
To invite a new collaborator, click the 'Invite Collaborator' button on the 'Collaborators' page. Fill out the invitation form by entering the email address of the person you wish to invite and selecting their role from the dropdown menu. Available roles include Editor, Author, and Viewer. Once you have filled in the details, click 'Send Invitation'. The invitee will receive an email with a link to accept the invitation.
- Double-check the email address before sending the invitation.
- Choose the role carefully based on the level of access you want to grant.
Managing Pending Invitations
Pending invitations are listed under the 'Pending Invitations' section on the 'Collaborators' page. Each invitation shows the email address of the invitee, the role they are invited to, and the expiration date of the invitation. You can cancel any pending invitation by clicking the cancel button next to it. This action will immediately revoke the invitation.
- Keep track of pending invitations to ensure they are accepted before they expire.
- You can resend an invitation if it expires or is accidentally deleted by the invitee.
Accepting an Invitation
When an invitee receives an invitation email, they can accept it by clicking the provided link. This link will direct them to a page where they can accept the invitation. If the invitation is valid and has not expired, they will be added to the team with the specified role. If the invitation has expired or is invalid, they will receive an error message.
- Ensure the invitee checks their spam folder if they do not see the invitation email.
- Invitations expire after 7 days, so prompt acceptance is recommended.
Updating a Collaborator's Role
To update a collaborator's role, navigate to the 'Collaborators' page and locate the member whose role you wish to change. Click on their current role badge to open the role editor. Select the new role from the dropdown menu and confirm the change. Note that you cannot change your own role.
- Only administrators can change roles of other members.
- Ensure you communicate role changes to the affected member.
Removing a Collaborator
To remove a collaborator from your blog, go to the 'Collaborators' page and find the member you wish to remove. Click the 'Remove' button next to their name. Confirm the action when prompted. This will immediately revoke their access to the blog.
- You cannot remove yourself from the team.
- Consider notifying the member before removing them.
Viewing and Canceling Invitations
You can view all pending invitations by navigating to the 'Collaborators' page and scrolling to the 'Pending Invitations' section. Each invitation shows the email, role, and expiration date. To cancel an invitation, click the cancel button next to it. This action will revoke the invitation and prevent the invitee from joining the team.
- Regularly review pending invitations to manage team access effectively.
- Canceled invitations cannot be reinstated; you must send a new invitation.
What's next?
Now that you know how to manage collaborators, explore other team management features such as setting permissions and roles. Check out our guides on optimizing team workflows and collaboration.