
Creating a New Blog
Step-by-step guide to setting up your blog on our platform
Step 1: Choose a Template
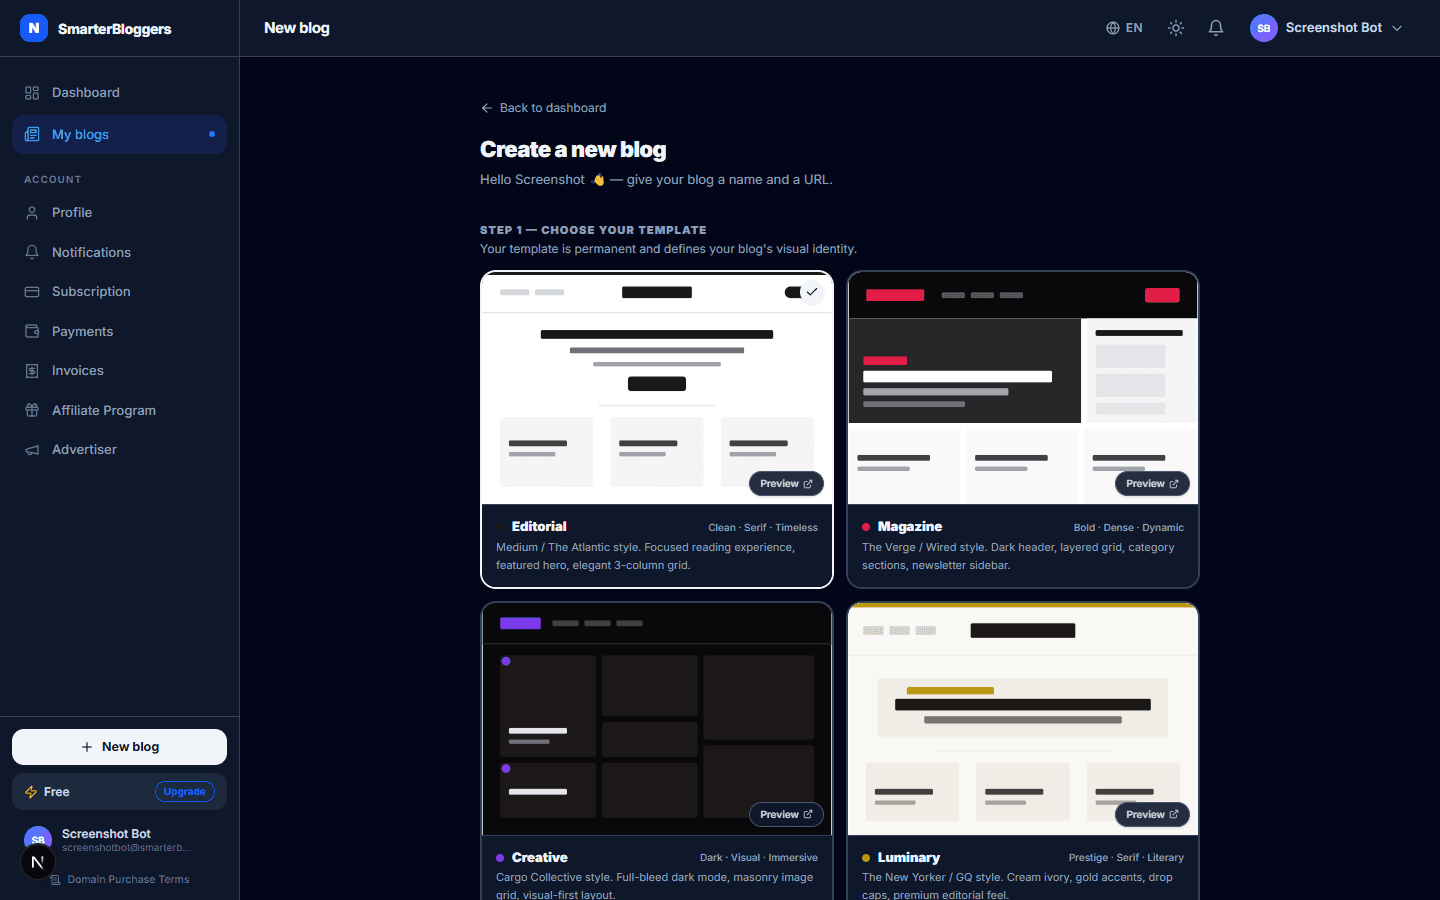
When you start creating a new blog, the first step is to select a template. You have four options: Editorial, Magazine, Creative, and Luminary. Each template comes with a unique design and color scheme. You can preview each template by clicking on the 'Preview' link. Once you select a template, it will be highlighted, and you can proceed to the next step.
- Choose a template that best fits the style and tone of your blog.
Step 2: Enter Blog Details
In this step, you need to provide some basic information about your blog:
- Blog Name: Enter a name for your blog. It should be at least 2 characters long.
- Slug: This is the URL path for your blog. It should be at least 3 characters long and can only contain lowercase letters, numbers, and hyphens.
- Description: Optionally, provide a short description of your blog.
- Category: Select a category that best describes your blog.
- Cover Image: You can upload an image from your computer or provide a direct URL to an image.
- Accent Color: Choose a color that will be used as the primary accent color for your blog.
- Ensure your blog name and slug are unique and descriptive.
- You can change the cover image and accent color later if needed.
Step 3: Domain Setup
After creating your blog, you will be prompted to set up a domain. You have three options:
- Buy a Domain: Search for available domains and purchase one directly through the platform.
- Connect an Existing Domain: If you already own a domain, you can connect it to your blog.
- Skip for Now: You can choose to skip this step and set up a domain later.
- Consider purchasing a domain for a more professional appearance.
- Ensure you have access to your domain provider's DNS settings if connecting an existing domain.
Domain Purchase Process
If you choose to buy a domain, follow these steps:
- Enter the domain name you wish to purchase and search for availability.
- If available, select the domain and proceed to the checkout.
- Fill in the registrant information, including name, email, phone, address, city, country, and zipcode.
- Choose the number of years for registration and whether to enable auto-renew.
- Agree to the Domain Registration and Purchase Terms & Conditions.
- Complete the payment using the integrated payment system.
- Ensure all registrant information is accurate to avoid issues with domain registration.
- Review the terms and conditions carefully before proceeding.
Connecting an Existing Domain
To connect an existing domain, simply enter your domain name and follow the instructions provided to update your DNS settings. This will typically involve pointing your domain's A record to our platform's IP address.
- Ensure you have access to your domain provider's DNS settings.
- Changes to DNS settings may take up to 48 hours to propagate.
Finalizing Your Blog Setup
Once you have completed the domain setup, your blog will be ready to use. You can access your blog's dashboard to start creating content, customizing settings, and exploring additional features.
- Visit the dashboard regularly to manage your blog and track its performance.
- Explore the available plugins and integrations to enhance your blog's functionality.
What's next?
Now that your blog is set up, you can start creating content and customizing your blog's appearance. Check out our guides on content creation and SEO optimization to get the most out of your blog.